As you start your conversion the
question is often - what do I keep and what can be eliminated
The next few picture should help with this question.
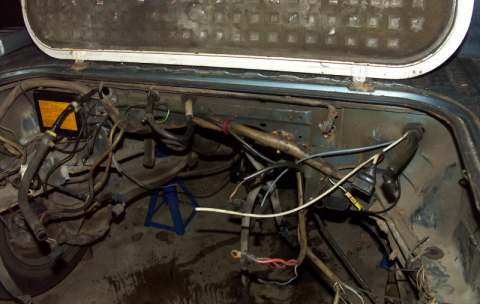
This is what your engine bay will look like
after you have removed the engine but have not touched any of
the wiring harness. This series of pictures is for a dirty 86
Vanagon
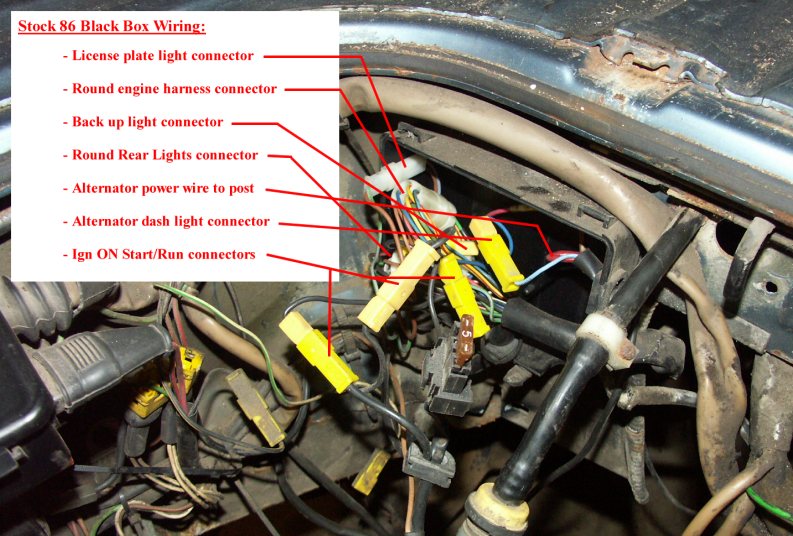
Here you can see the main connectors in the
Vanagon Black Box.
The next few picture will show what you
need to keep
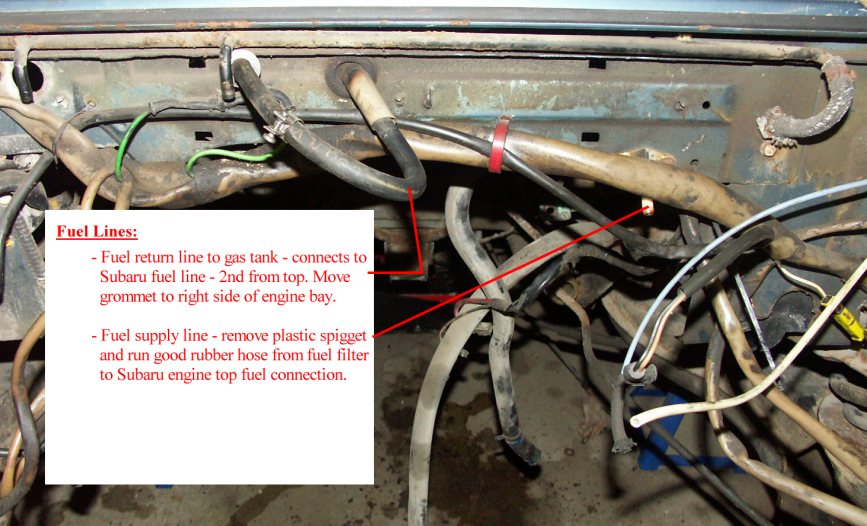
Many people have had problems with the plastic
fuel supply line failing so now is a good time to replace it -
you don't want a fire with your new engine.
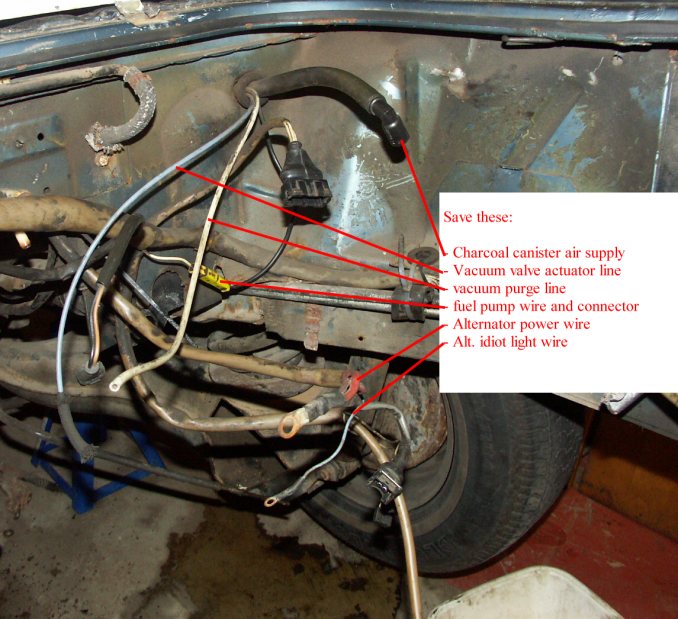
Picture says all. See additional
picture of charcoal canister below.
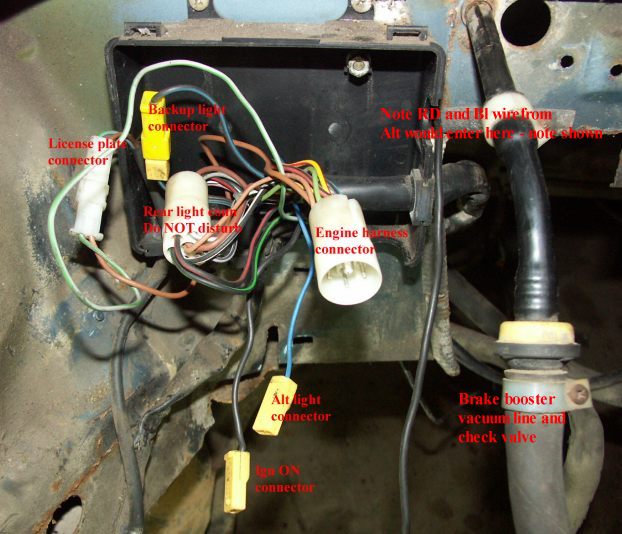
After you have removed the coil, relay box and
engine harness you should be left with these connectors. This
is where your main Subaru interface will take place. 84 and
earlier Vanagons only have one round White connector for the
rear lights - the engine harness is connected via one and two
pin individual connectors.
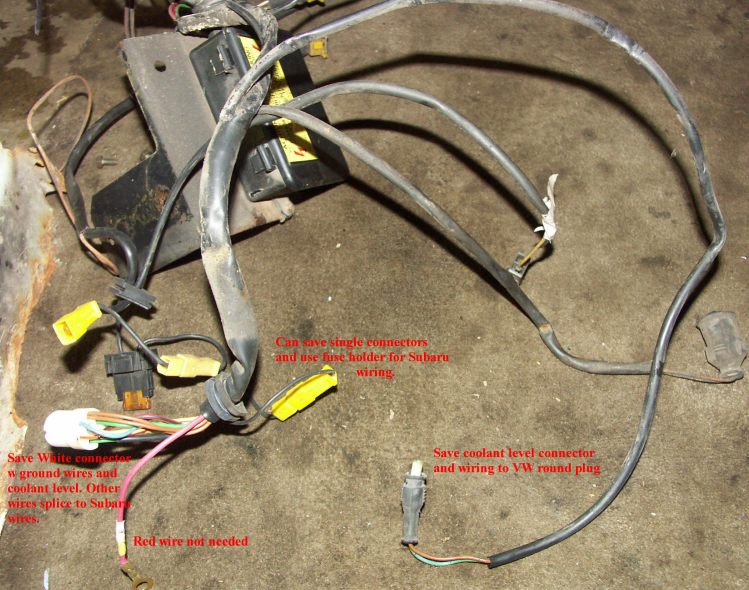
After you have the relay box removed you need
to carefully save some parts of the associated wiring. You
need the round White connector complete with the coolant level
wire. See picture for other comments.
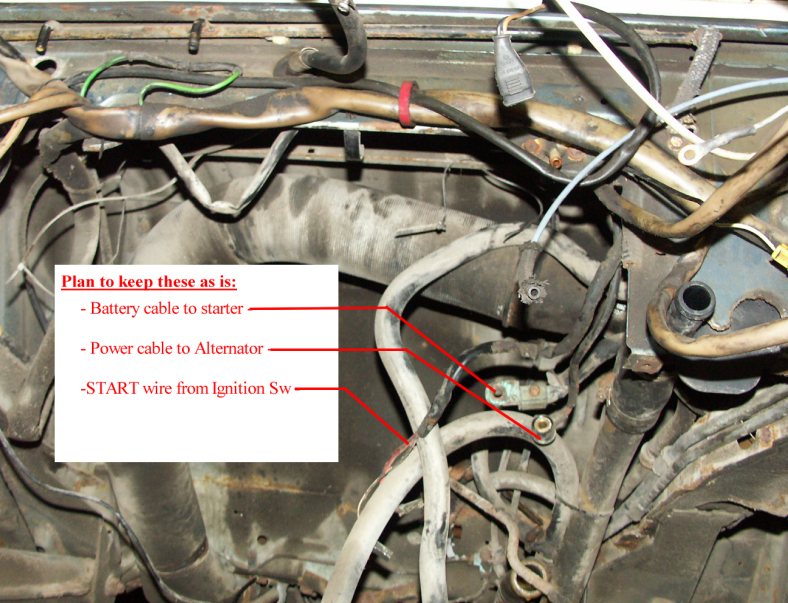
This picture shows the wiring associated with
the starter. You will need all of this wiring so tie it up out
of the road for now.
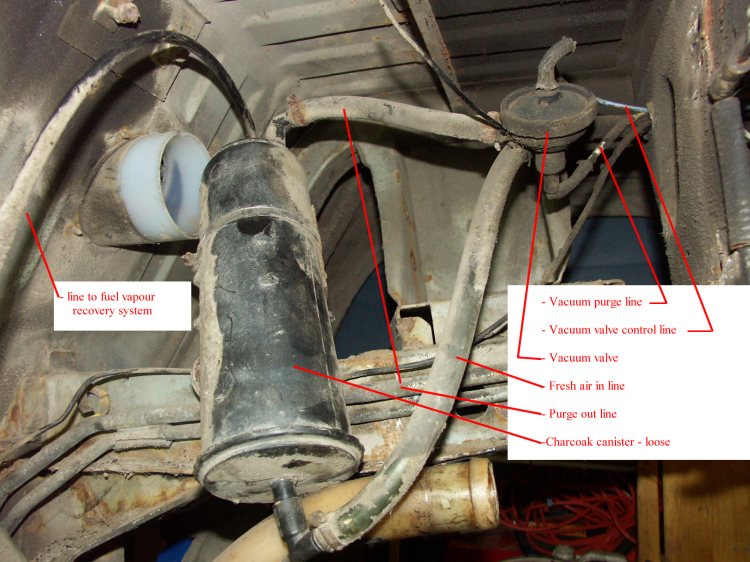
This is a picture of the 86 and up fuel tank
emissions canister and associated lines. I have dismounted the
canister and moved it so we can see what is going on. You will
need to refer to this later when connecting up you Subaru
vacuum system. On 85 and earlier Vanagons the vacuum valve is
in the engine bay on the right hand side at the back.
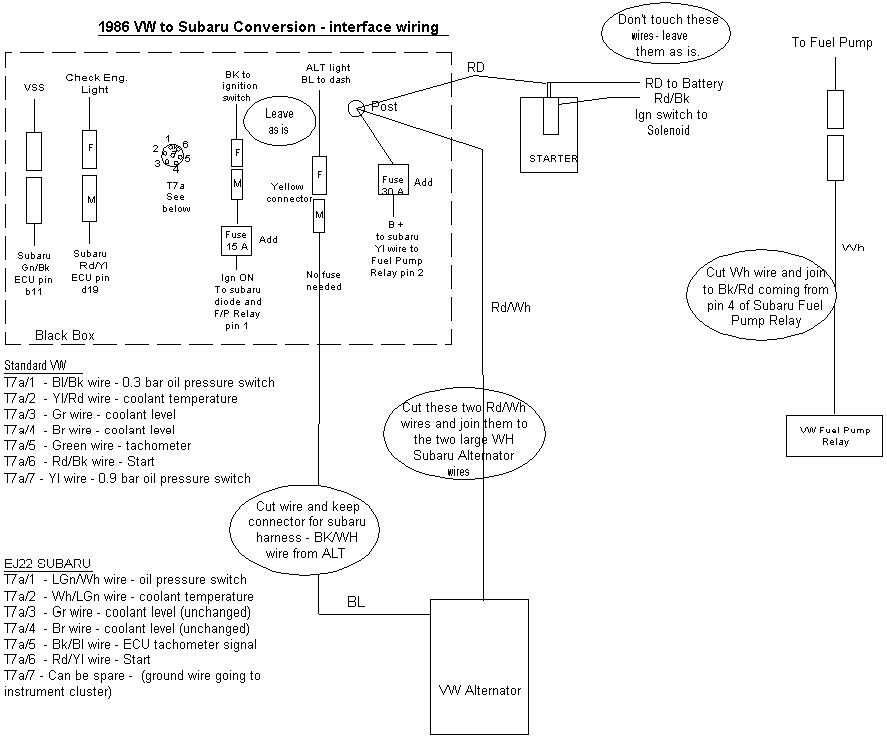
Keep in mind that this is the basic interface you will end up
with when you come to installing your Subie engine. I have
diagrams like this for nearly every Vanagon year, if you send
me an e-mail I can send you one for your year of Vanagon.
NOTE: Use these ideas at you own risk - no warranty or
guarantee implied or included. Tom